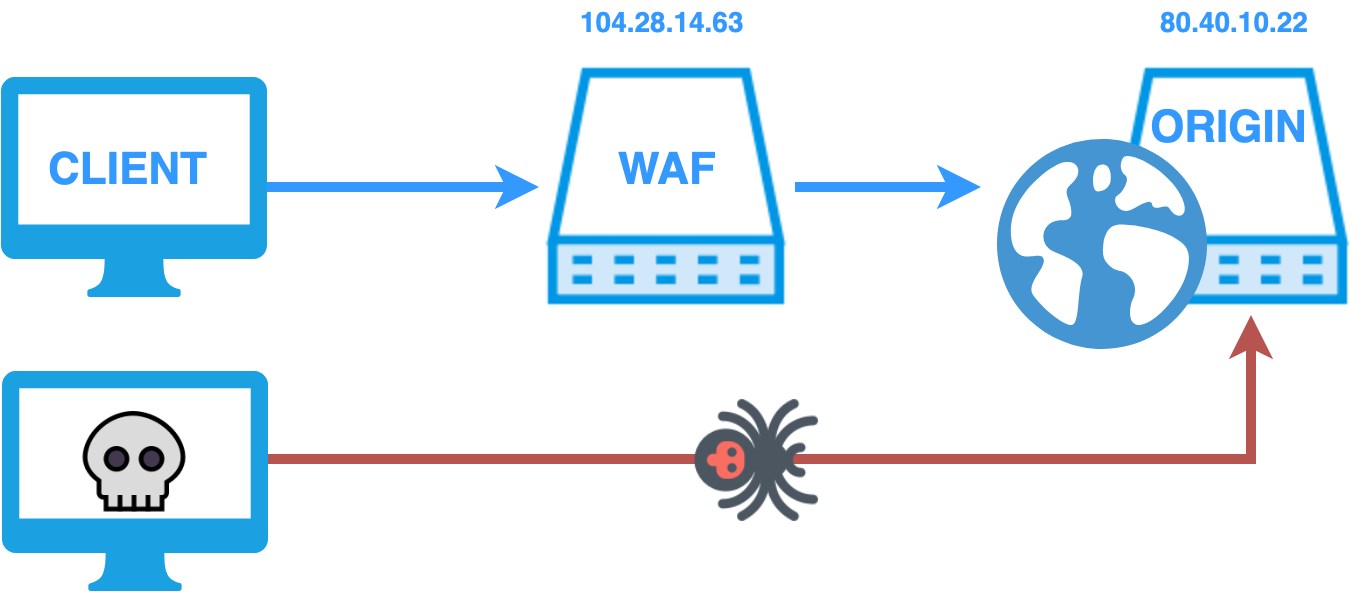
Web application firewalls (WAF) are add-ons (modules) of web servers (such as mod_security for Apache), or services (such as Cloudflare, Incapsula, SUCURI) that before sending a request received from a user to a web-server, analyze it and, if it can be dangerous, block or modify it.
Application firewalls can additionally perform intrusion detection and prevention functions.
If WAF is a web server module, then this software runs on the same server (computer). If WAF is a separate service, then the work scheme is as follows:
1) The website to be protected runs on the same server without protection.
2) DNS record A provides the IP addresses of the web application firewall, that is, Cloudflare, Incapsula, SUCURI, or some other instead of IP address of this site
3). After that, when a user makes request to the protected website, all requests are sent to the Cloudflare, Incapsula, SUCURI or equivalent service.
4) This service receives the request, processes it and makes a request to the source server (which, let me remind you, is not even protected), receives the necessary page/data from it and redirects it to the requesting user.
For a normal visitor connecting to a website, there is no difference, everything happens seamlessly. But for the purpose of auditing a website, web application firewalls can be problems. WAFs block malicious requests and protect against (D)DoS attacks. At the same time, no requests from scripts (bots) can be accepted at all – they are filtered out at the initial stage, or at the captcha passing stage, which makes it impossible to use tools such as WPScan, sqlmap and other programs to search for vulnerabilities of the website. If, in the case of WAF embedded in the server (for example, mod_security), only one bypass option is possible – the construction of such requests that bypass patterns based rules, then for WAF services there are probably two options:
1) The same as for ordinary WAF – that is, an attempt to outwit the rules;
2) Sending requests directly to the server, bypassing WAF.
In the overwhelming majority of cases, the source server (which they are trying to protect with the help of an external WAF service) is still configured to accept and process requests from anyone (and not just from WAF, which acts as a proxy). Therefore, you can completely neutralize their attempts to protect with the WAF service if you just know the real IP of the website.

Therefore, the “bypass” of Cloudflare, as well as Incapsula, SUCURI and others, comes down to finding a real IP site. This topic (search for a real IP site) has already been discussed several times on the miloserdov.org site, since a real IP is also needed for other purposes: information gathering, perimeter research, search for other sites on the same server, etc. By the way, on these issues see articles:
This task is dedicated to specialized tools, such as CloudFail. In mentioned articles, I often used this method: look at the SecurityTrails history of DNS records for the domain and checked (using cURL and specifying the host name) which of the found IP addresses will respond properly.
This technique, as well as some others, is automated in the Bypass firewalls by abusing DNS history script (this is the name of the program).
The following services are used in the work:
This script tries to find out the real IP by different methods:
All found IP addresses are queried for verification.
Installing Bypass firewalls by abusing DNS history on Kali Linux:
sudo apt install jq git clone https://github.com/vincentcox/bypass-firewalls-by-DNS-history cd bypass-firewalls-by-DNS-history/ bash bypass-firewalls-by-DNS-history.sh --help
Installing Bypass firewalls by abusing DNS history on Debian, Linux Mint, Ubuntu and their derivatives:
sudo apt update sudo apt install jq git curl git clone https://github.com/vincentcox/bypass-firewalls-by-DNS-history cd bypass-firewalls-by-DNS-history/ bash bypass-firewalls-by-DNS-history.sh --help
Installing Bypass firewalls by abusing DNS history in BlackArch:
sudo pacman -S bypass-firewall-dns-history jq
Using the program is very simple – there is just one mandatory -d option after which you need to specify the domain to be analyzed:
bypass-firewall-dns-history -d anti-malware.ru
As a result, the real IP address of the server was found for the anti-malware.ru domain:
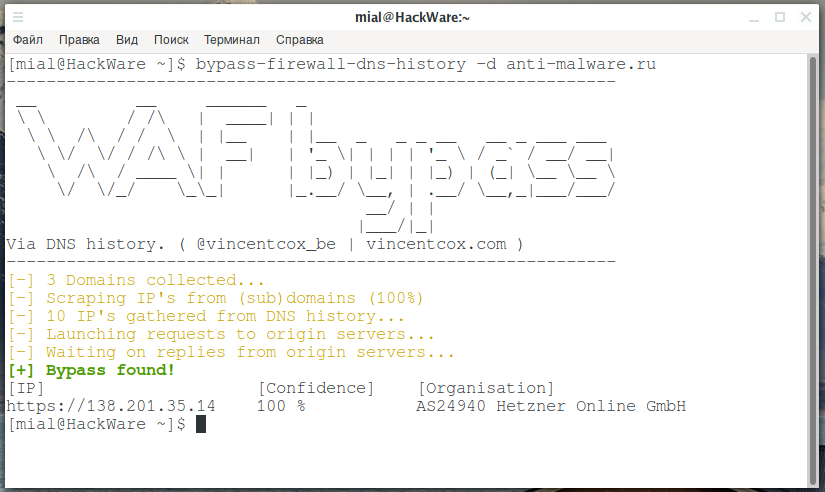
The [IP] column is the address that can be accessed directly, bypassing WAF. [Confidence] is the degree of confidence that the address data is correct (there may be several IP variants with varying degrees of confidence). [Organization] – who owns the found IP.
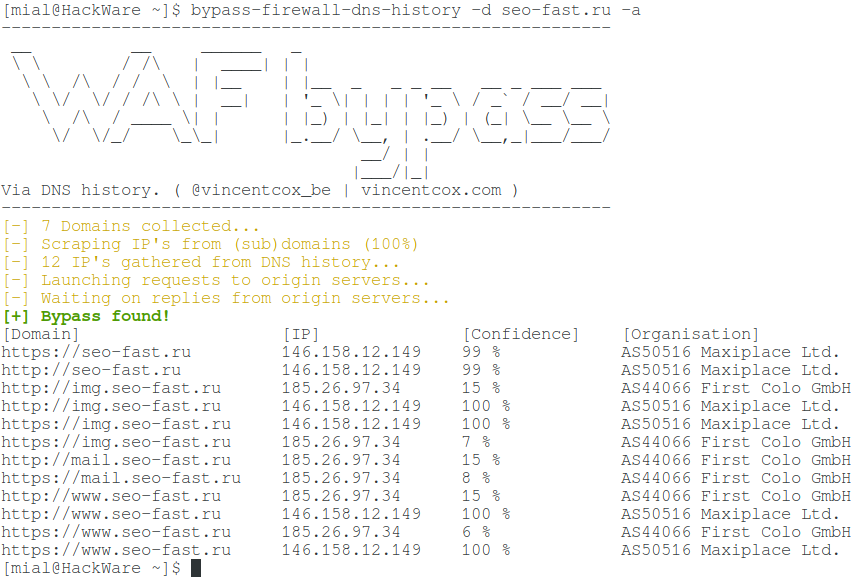
The program will collect a list of IP and will check them only for the main domain. If you want to check if the found IPs match for the detected subdomains, then use the -a option:
bypass-firewall-dns-history -d seo-fast.ru -a
To save the results to a file, use the -o option, after which you need to specify the file name, for example:
bypass-firewall-dns-history -d seo-fast.ru -a -o found_ip.txt
Only found IPs will be saved to the file.
For more complex cases, when the program could not determine the real IP address, it can be helped. The fact is that although the bypass-firewall-dns-history script uses fast subdomain search services, they do not always show the most complete results. You can build your own list of subdomains with other tools and services. For example, using Amass:
amass enum -d seo-fast.ru -o subdm.txt
The found subdomains will be saved to the subdm.txt file. Now using the -l option, you can specify the path to the file with additional subdomains, which will also be used to search for the real IP site:
bypass-firewall-dns-history -d seo-fast.ru -l subdm.txt
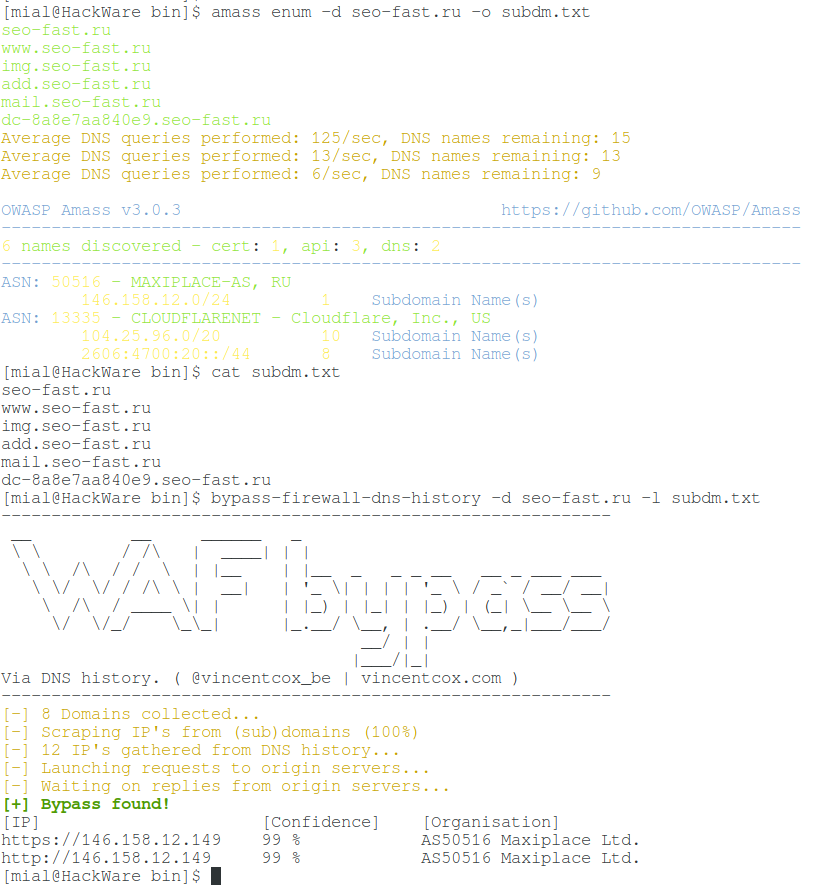
In this case, the real IP was determined even without a subdomain search by an external program – this is just an example of an algorithm for the action for difficult cases.
When you find a way to bypass the firewall of the web application (you found the real IP of the site), then you have two options:
The first option: edit your host file – as a result, any requests from your OS from any program will be sent directly to the site, bypassing the firewall. On Linux/Mac systems, this is the /etc/hosts file, and on Windows, this is c:\Windows\System32\Drivers\etc\hosts. Add to it something like this:
80.40.10.22 vincentcox.com
The second option: setting up Burp Suite. Perform configuration by analogy with the screenshot:
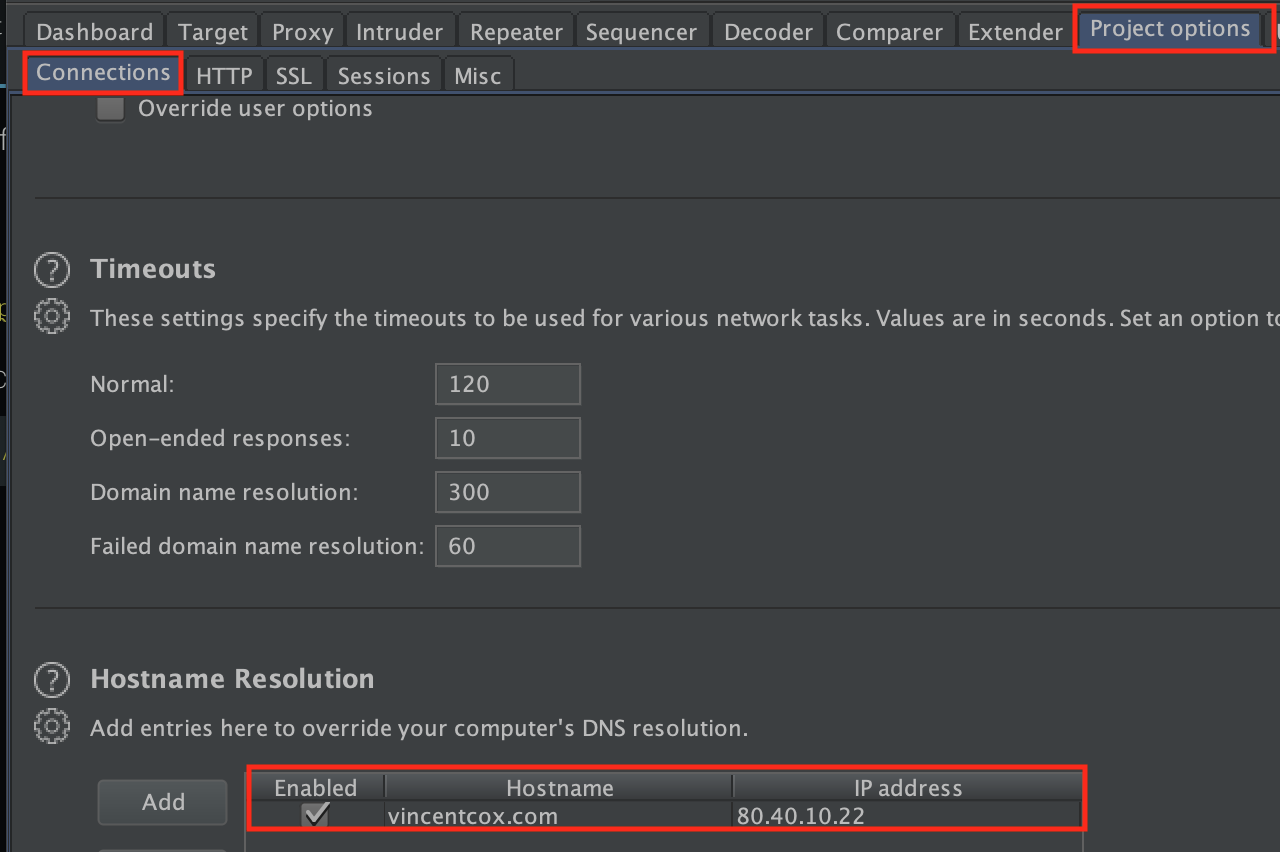
From now on, your HTTP traffic will go directly to the original web server. Now you can perform the penetration test in the usual way, your requests will not be blocked in WAF.
In this article I showed how to use a fairly simple program Bypass firewalls by abusing DNS history. Also, a service based on this script has been added to SuIP.biz site: https://suip.biz/?act=bypass-waf

You can always use it if you don’t have Linux at hand.